Overview
The order in which items are displayed can be customized for a variety of components within the SmartSimple interface. This flexibility allows users to tailor the layout and presentation of information according to their preferences or specific workflow requirements. By adjusting the display sequence, users can prioritize the visibility of certain elements, making it easier to access important data quickly and efficiently. Whether it involves arranging lists, menus, or other interface components, the display order settings provide a way to enhance usability and improve overall user experience within the SmartSimple platform.
List Views
- The display order specified on the list view configuration page determines the sequence in which multiple list views are presented to users who have multiple roles or several personal list views.
- List views are displayed in the "List View" dropdown menu in ascending order based on the "Display Order" value. The list view with the lowest display order will be shown by default.
Custom Fields
The display order assigned to a specific custom field dictates its position on the page relative to all other visible custom fields.
The "Re-Order" Button
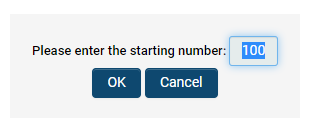
Selecting the Re-Order button will reset the display order starting at 100 and increment by 100 for each subsequent field. Users may manually adjust the starting number, after which increments of 100 will continue from the new initial value.
Best practice is to use increments of 100 to allow for the insertion of additional fields between existing ones.
- It is recommended that no two fields share the same display order number, as this may cause unpredictable rendering of the display order on the page.
Drag and Drop Re-Order Fields
Within the custom fields configuration list view, users can now drag and drop individual fields or groups of fields to reorder them.
1. Navigate to a Custom Field within UTA Settings.
System Administration (gear icon) >> Tracking Applications >> [Edit] *UTAname >> Level 1/2/3 (tab) >> [Custom Fields]
2. On the Custom Fields page for your application, select the numbered list icon to enable Re-order Mode.
3. You can now drag and drop rows to adjust the order.
Types
The display order assigned to a specific Level 2 or Level 3 Type determines its position within the dropdown menu when selecting the Type for a record, relative to other Types.
The "Re-Order" Button
Clicking the Re-Order button will prompt the user to enter a new starting number. The display orders for all Types within the UTA will then be reset, beginning with the new starting number and incrementing by 100 for each subsequent Type.
