Overview
Statuses constitute a fundamental concept within the SmartSimple Cloud platform. Each status denotes the state of the associated object. Statuses can be configured using the Universal Tracking Application (UTA) for all types of objects you create, including Level 1 objects as well as Level 2 and Level 3 activities. Additionally, statuses may be applied to both contacts and organizations. This article primarily focuses on the application of statuses within the Universal Tracking Application; however, the same principles are applicable to contact and organization statuses.
Purpose
Statuses can be assigned to all records within SmartSimple Cloud, encompassing users and organizations. By assigning statuses to entities in your system, you can effectively monitor your interactions and relationships with all stakeholders, both internal and external.
A practical example illustrating the utility of statuses is when an organization's Status is marked as Registered, but not yet Verified. Upon updating their status to Verified, you can record this change within your SmartSimple instance, ensuring that both the status and the record are updated concurrently. You may create as many status options as necessary; these can be modified and updated within your Global Settings, UTA Settings, or directly from any individual organization or applicant record.
Configuration - Essentials
Creating UTA Statuses
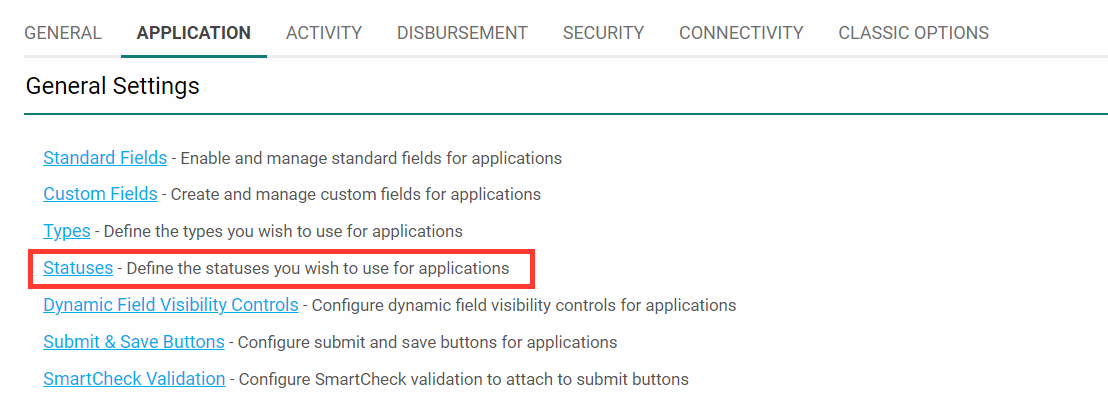
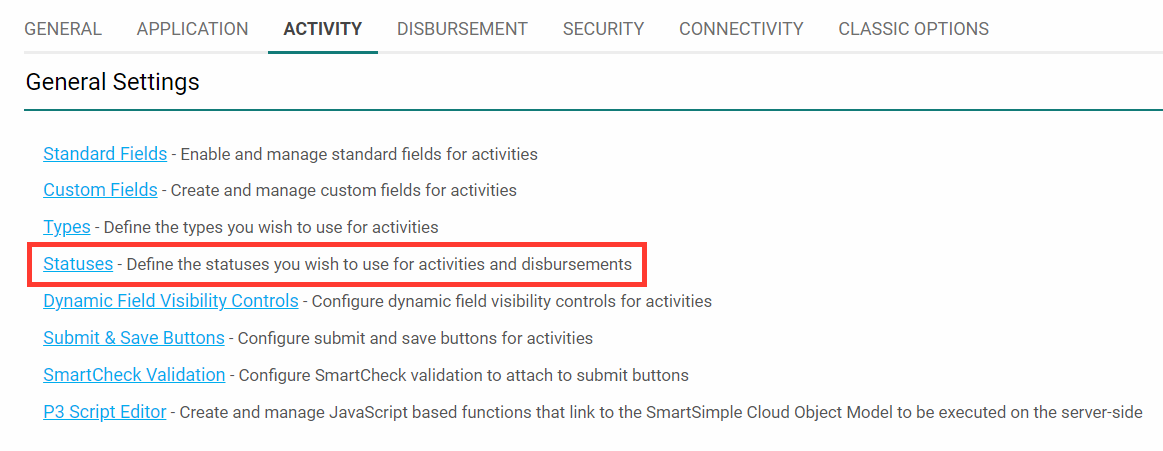
To modify statuses within a UTA, you must possess Administrator Access for that UTA. With this permission, navigate to the Configuration Settings of the UTA, indicated by the gear icon. Then, select the Level 1, Level 2, or Level 3 tab, followed by clicking the Statuses link.
The Status settings for Levels 1, 2, and 3 are analogous, with certain distinctions outlined below.
- For Level 1 statuses, click the Statuses link within the Level 1 settings tab, which is the second tab from the left in the UTA Settings.
- For Level 2 statuses, click the Statuses link within the Level 2 settings tab, the third tab from the left in the UTA Settings (if enabled).
- For Level 3 statuses, click the Statuses link within the Level 3 settings tab, the fourth tab from the left in the UTA Settings (if enabled).
- Detailed information for each status is displayed upon selecting a specific status.
Organization and Contact Statuses
- Organization statuses can be accessed via Global Settings > Organizations > Statuses.
- Contact statuses can be accessed via Global Settings > Users > Statuses.
Status Settings
Each status includes the following configurable settings:
General Tab
- Status ID - A unique internal system identifier used to reference the status.
- Name - The designated name of the Status.
- Caption - The default display name for the status.
- Display Order - The sequence in which statuses appear within the Status settings and dropdown menus.
- Description - Optional comments or notes. Note: Descriptions are visible only on the configuration page.
- Status Group Name - Utilized to consolidate multiple individual statuses under a single overarching status. This feature is exclusive to UTA statuses.
- Tooltip - A descriptive text displayed when the user hovers over the caption (used with the Status Indicator). This is available only for Level 1 statuses.
- Color Code - The color assigned to represent each status. This color appears in both list and detail views. Click the color palette button to open the color picker.
- Lock On Status - This setting locks the record, preventing changes until it is unlocked.
- Is Default Status - Specifies the default status selected when creating a new record.
- Is Default Copy Status (UTA Statuses only) - When the Copy function is used to duplicate a UTA record, the new record will adopt the status marked with this setting. If no status is designated as Is Copy Status, copied UTA records will retain the original record's status.
- Exclude from Status Indicator - Selecting this option excludes the status from the Status Indicator Level 1 Standard field.
Permissions and Availability Tab
Role Permissions
- Allow to Set Roles - Specifies the roles authorized to assign the status. If no roles are specified, any user may assign any status.
- Override Lock Roles - Identifies roles exempt from the Lock On Status restriction. If Lock on Status is enabled without defining any Override Lock Roles, the item remains locked indefinitely.
Note: Any role possessing the UTA Manager Permission can override the Lock on Status setting, regardless of specification here.
Availability
- Available Status - Applicable only to User and Organization statuses. Statuses listed here are selectable from this status.
- Enabled on Record Types - Exclusive to UTA Statuses. This status is available for the record types specified here. If no record types are defined, the status is available for all record types at this level.
Annotation System Role Permissions
Available only in UTA Statuses. Roles assigned here will have varying levels of access to Annotation Mode at this status.
- View Annotation Roles - Defines roles permitted to view annotations added to the object at this status (annotation functionality is exclusive to UTA objects).
- View and Create Annotation Roles - Defines roles authorized to both view and create annotations on the object at this status.
- Edit Field in Annotation Mode Roles - Defines roles permitted to edit fields with attached annotations.
- Open Record in Annotation Mode - Defines roles authorized to edit the entire record in annotation mode.
Status History
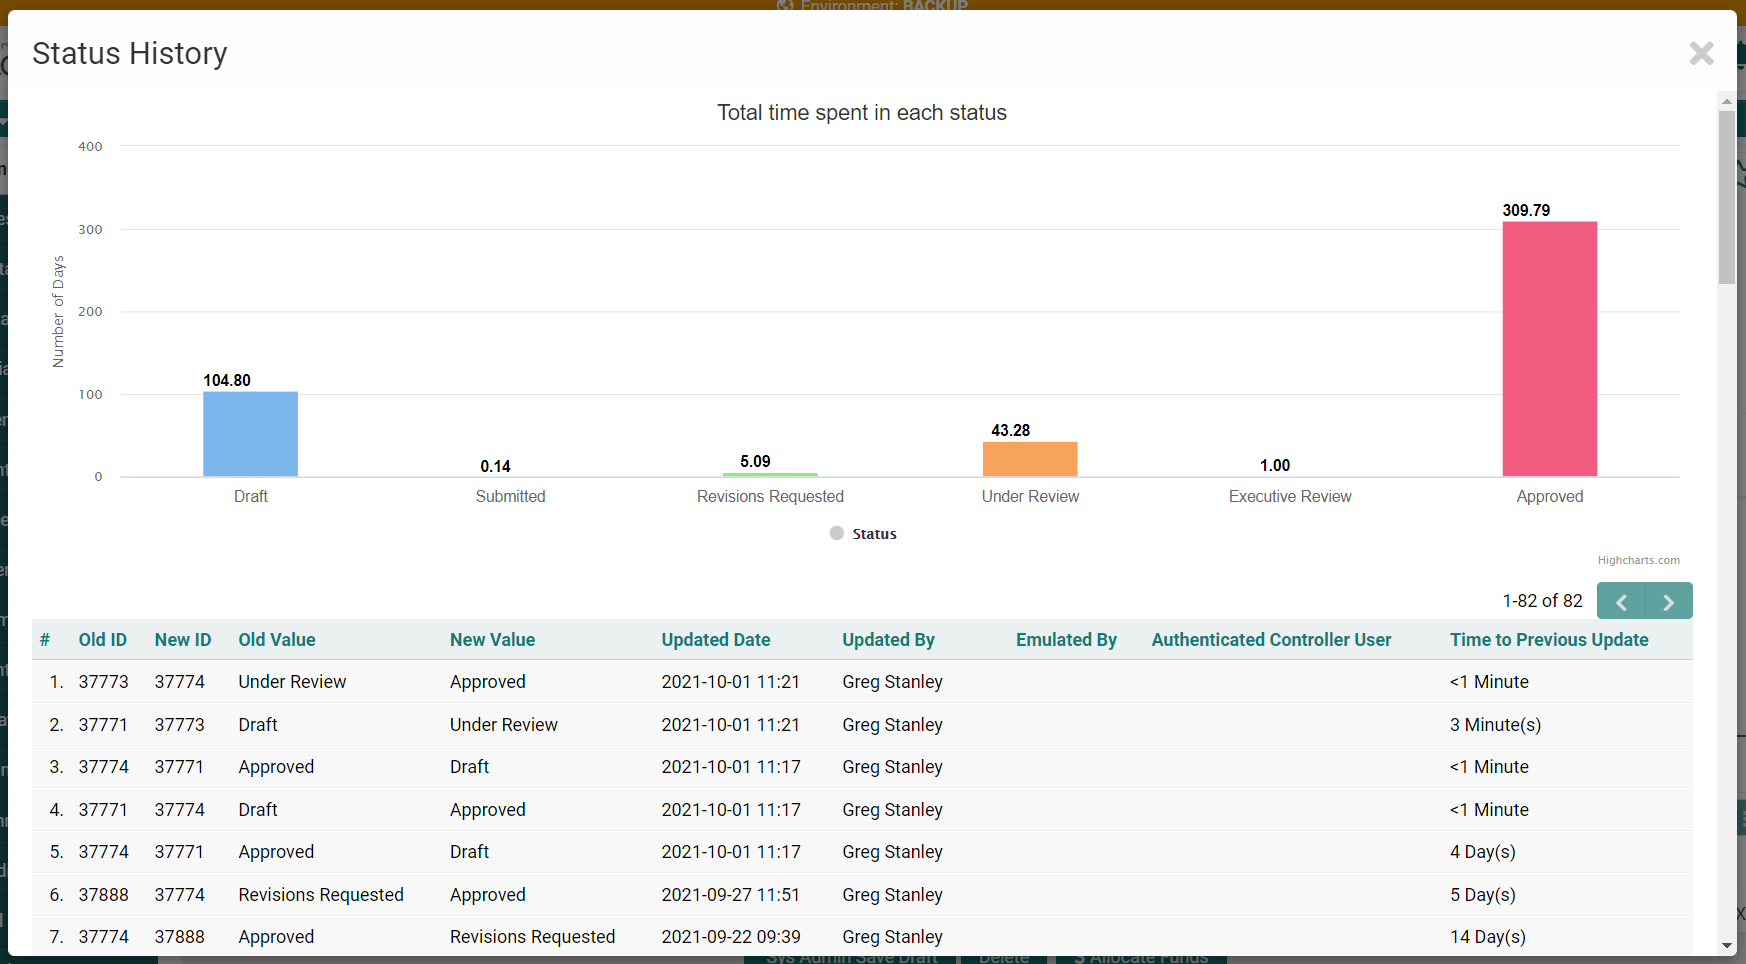
If the Status Standard field is configured with Track Changes enabled, any user with View Field History Permissions will observe a small clock and refresh icon beneath the Status field.
Selecting the History icon displays a detailed history overview along with a bar chart depicting the duration spent in each status. The duration (in days) can be incorporated into reports by utilizing data from the "Standard Field Audit Log" dataset.
Status History and Time Duration Report
A SmartSimple NEO report can be created to provide a detailed display of the Status Change History over a period of time, encompassing multiple records. This report allows users to track and analyze the progression of status changes, offering valuable insights into trends and patterns across various entries. By generating this report, users can effectively monitor how statuses have evolved, identify any significant shifts, and make informed decisions based on the historical data collected from numerous records.
- Navigate to the edit window of the target UTA's Level-1 Status standard field:
System Administration >> Tracking Applications >> [Edit] *UTAname >> Level-1 (tab) >> Standard Fields >> [Edit] Status- Enable the [Enable Status Duration Log] option.
- Select the desired status values for daily time capture.
- Within the Report Builder, add your primary UTA Level-1 dataset, then add the associated Standard Field Audit Log as a secondary dataset from the same UTA.
- In the dataset connector, set the Base Link to Status.
- Include the desired columns in your report, ensuring that Status and Duration are among them.
HistoryOf() Function
You can utilize the following variable to display the history of status changes within a custom field labeled as Special - Web Page View. This allows you to track and present the sequence of status updates directly within that specific custom field, providing a clear and organized view of all changes made over time. By implementing this variable, you enhance the visibility of status modifications, making it easier to monitor progress and maintain accurate records within your system.
@HistoryOf(Status)@Status Translation Settings
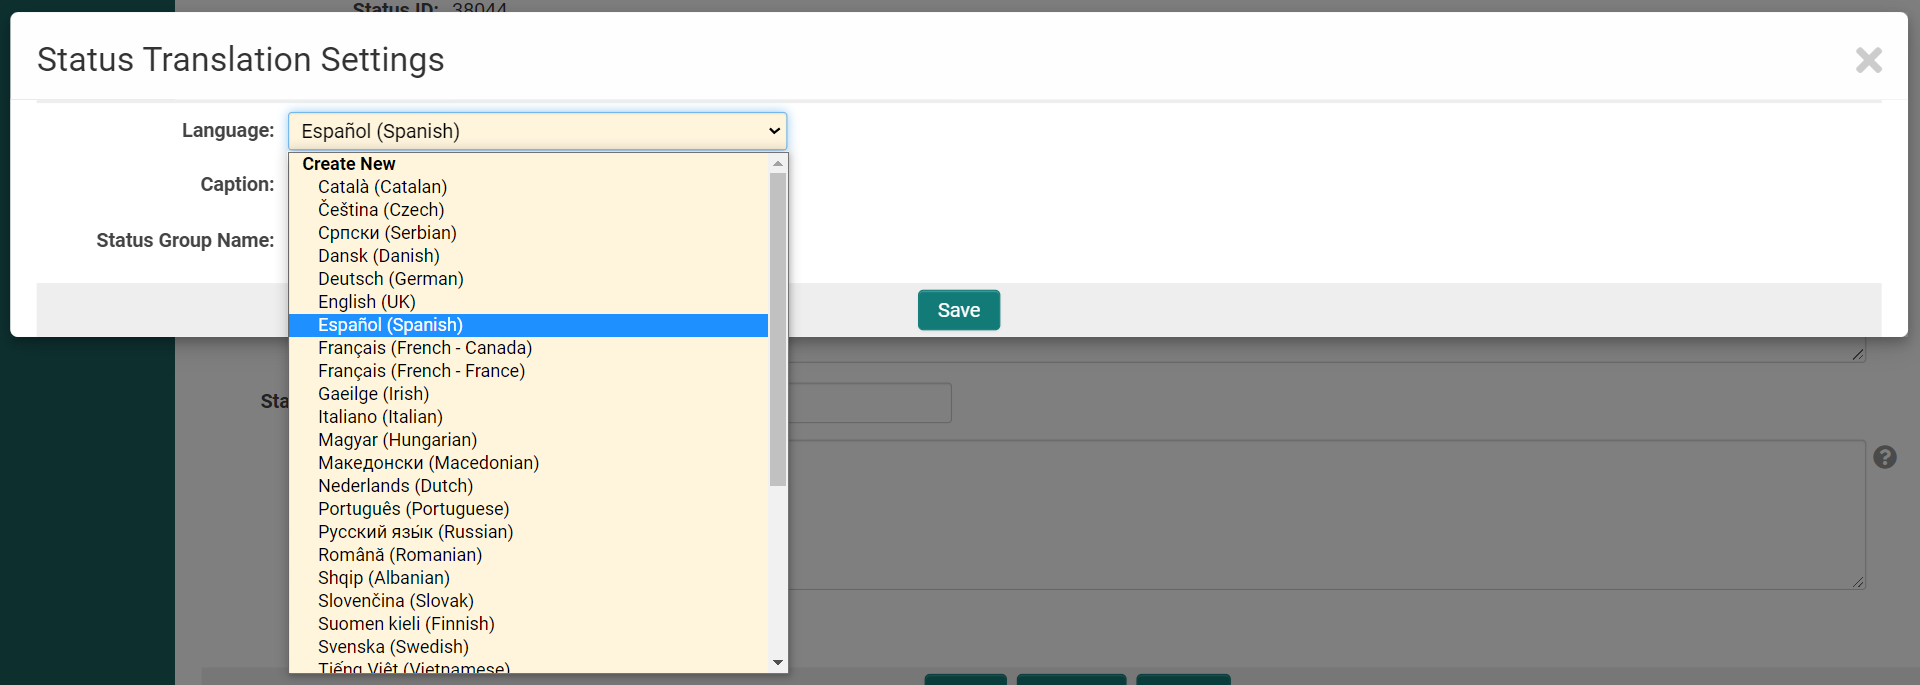
Define a status Caption and Group Name for each supported language.
- When editing a status, select the Status Translation Settings button located at the top of the window.
- Choose the desired language from the Language dropdown menu.
-
- Input the translated Caption and Group Name, then click Save.
- The caption in the selected language will be displayed to users according to the language preference specified in their Personal Settings.
StatusIDs
When utilizing Advanced Logic or Visibility Condition for standard fields, it may be necessary to restrict content based on the StatusIDs associated with the source record.
The syntax of the conditional statements references the StatusID, which is the system-assigned numerical value corresponding to each Status.
To identify the StatusID of a Level 1 type, please follow these steps:
- Navigate to the list of Statuses on the UTA Settings page.
- The StatusID is displayed in the right-most column.


