Overview
Utilize your SmartSimple system to create, share, and monitor appointments and events related to your granting, research, or claims management activities. Integrating your calendars within SmartSimple negates the necessity of managing multiple calendars across different applications, thereby preventing conflicts, event duplication, and the oversight of significant dates that could potentially affect not just you, but your entire community.
Personal Calendars
Each user is provided with a personal calendar that allows for the addition of individual appointments while also linking to various events and activities across all SmartSimple applications. For instance, if you schedule a telephone call with a customer using the Sales Tracking application, it will be reflected on your calendar. Furthermore, if another individual schedules an event and associates you with it, that event will also appear on your calendar. Employ color coding and other features to effectively manage meetings, events, appointments, and calls.
Shared Calendars
Shared calendars serve to monitor activities that are not directly linked to a specific individual. These calendars can be utilized to oversee training schedules, meeting room availability, or statutory holidays. This feature is particularly beneficial for teams, enabling members to be informed about colleagues' meeting times, statutory holidays, and any changes pertaining to upcoming events in real-time.
Multiple Calendars
You have the capability to manage multiple personal and shared calendars as necessary; this is particularly advantageous for administrators who need to oversee the schedules and activities of various groups or individuals simultaneously.
Calendar Checks for Scheduling Conflicts
When activated, this specific calendar feature notifies you of potential conflicts for anyone associated with a new event, triggering an alert to inform you of the conflict. You may still extend an invitation, but you will be forewarned that they may be unable to attend.
Recurring Events in the SmartSimple Calendar
Effortlessly schedule recurring meetings within SmartSimple. You can create regular weekly, bi-weekly, or monthly events, assign resources, and include information such as dial-in codes for all attendees.
Users can quickly and conveniently add new attendees, modify meeting locations, update dial-in numbers, or adjust the timing of any recurring meeting within any SmartSimple calendar. This functionality eliminates the need to completely recreate recurring events whenever details change during a recurring event cycle. Simply select the recurring event, update the necessary information, and save.
Calendar Fields
The Calendar Fields section within the UTA Settings - Miscellaneous page allows for the configuration of activity displays on the UTA Calendar.
This field accepts Web Page View Field Variables and logic.
Examples:
This will only display the field with field ID 55222 for “Contract” type activities on the Project calendar:
<!--@sslogic('@type@'='Contract')-->@#55222#@
<!--@end-->
This will display the type, owner name, and start/end time if the status is scheduled or re-scheduled.
<!--@sslogic('@statusname@' in ('scheduled','re-scheduled'))-->@type@
   @parent.owner.fullname@
   @starttime@-@endtime@
<!--@end-->
Calendar Types
There are three types of calendars in SmartSimple – personal calendars, shared calendars, and resource calendars.
Personal Calendar
Every user has a personal calendar.
You can directly add events to your calendar, but it is also populated with events and activities created in other SmartSimple applications. For instance, if you use the Sales Tracking application and schedule a telephone call with a customer, it will be displayed on your calendar.
If another user schedules an event and associates you with it, that event will also appear on your calendar.
Calendar entries can be color-coded, and users are able to switch between event coloring based on event type or calendar type on the fly from a dropdown menu at the top of the calendar.
Initially, your calendar will be private, but you have the option to share it with other groups of individuals.
Shared calendars are utilized to monitor activities that are not specifically linked to any one individual. These calendars can track activities such as training schedules, meeting room bookings, or statutory holidays.
- You can create an unlimited number of shared calendars.
- Shared calendars can be shared with multiple organizations and roles. However, each user will only see the calendars for which they have received permission.
- You can enable Internet access for a common calendar and link it to your website. This feature is useful for publicly displaying a calendar of events. Additionally, you can connect a registration form to a calendar event to facilitate online registration.
To create a shared calendar, you must possess the Create Calendar permission.
Resource Calendars
Resource calendars are associated with individuals (or other types of resources) that do not log into the system but require calendar management.
If you need to manage calendars for these types of resources, you must enable the Manager Permission – Job Costing and Resources – Manager.
- Once this permission is enabled, you can designate any contact or user as a Resource (using the user’s Setting Resource menu).
- The resource’s calendar can then be accessed directly from the contact view window via the calendar icon.
- After enabling this feature, you can access a new activity type – Available. This activity type indicates that a resource is available for assignment to a task.
Calendar List
Selecting the Calendars menu within the Communications menu will display a comprehensive list of all calendars.
1. Click on the Communications, Calendars menu.
The Calendar list will be presented.
The following items will be displayed on the Calendar list.
2. Select the My Calendar link.
There is no need to utilize the select calendar checkbox if you wish to view only a single calendar.
The Personal Calendar window will be displayed.
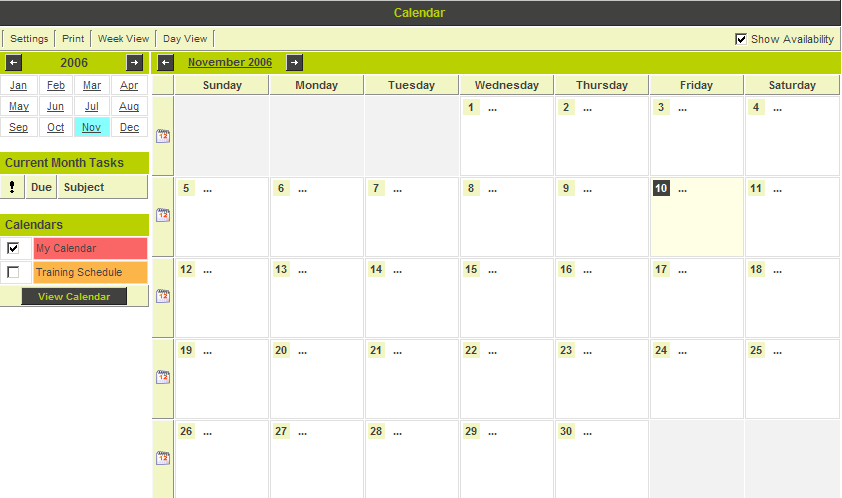
- The calendar is initially presented in a monthly view for the current month.
- You can toggle between month, week, and day views by clicking the tabs located at the top of the calendar.
- To switch to week view, click the small calendar icon located at the left side of each week.
- To switch to day view, click on the calendar date.
- The small monthly calendar at the top left allows navigation between months or years.
- Outstanding tasks for the current month are displayed below the Monthly calendar. When you change your view to a weekly or daily format, the task list will adjust to display only tasks due within that specific week or day.
- A list of selected calendars is displayed beneath the monthly task list. You can click on the Calendars you wish to view.
The arrows positioned to the left and right of the month and year are utilized to navigate the calendar display from month to month.
Calendar Task
When creating a new Calendar Event, you have the option to designate it as a task rather than an event:
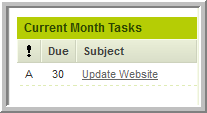
The task feature allows you to specify a due date and priority.
When viewing the calendar, the item will appear in the Task List located in the bottom left corner of the page, rather than on the calendar itself.
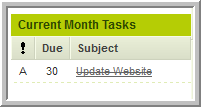
Once the status of the task is updated to Complete, it will be marked as such:
Calendar Styles
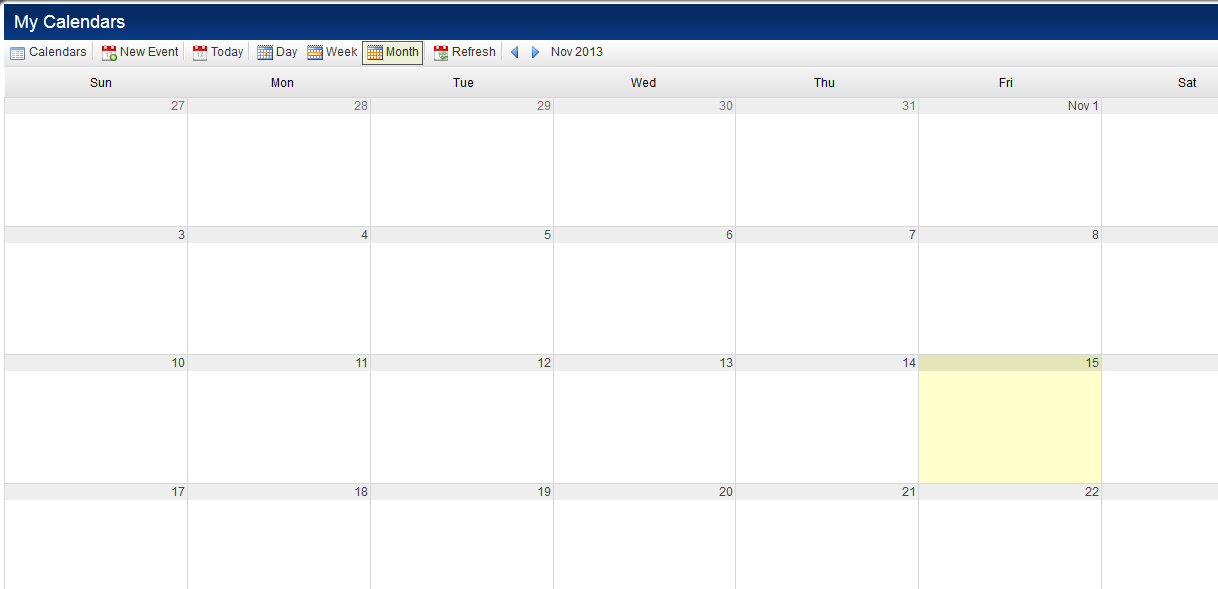
SmartSimple now offers access to two distinct types of calendars.
- Default Calendar: The SmartSimple Calendar style has been updated and enhanced as of October 2013, introducing new functionalities such as the ability to click-and-drag to reposition events. This is the default calendar available to users unless they explicitly request the classic calendar.
- Classic Calendar: The previous version of the calendar, which users must explicitly request.
The selected calendar type will be applied throughout your instance of SmartSimple.
Selecting Classic Calendar
The option to revert to the classic Calendar style can be enabled by selecting the "Use Classic Calendar" setting on the Global Settings page.
Adding Notes to Calendar Events
To modify the details of an event—such as indicating its completion—you should utilize the Edit Event link.
Conversely, if you wish to append notes to the event, you should employ the Event Notes feature.
The ability to add notes to events is a significant feature that permits multiple annotations on the same event, even by different individuals.
You may also continue to add notes if you have additional reflections on an event.
1. Access any event on the Calendar.
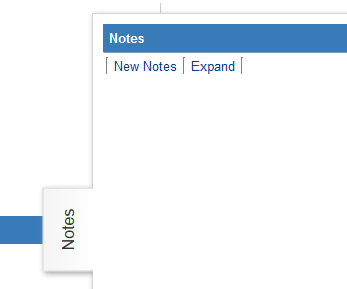
The notes will be displayed on the right side of the screen.
2. Click the New Note button.
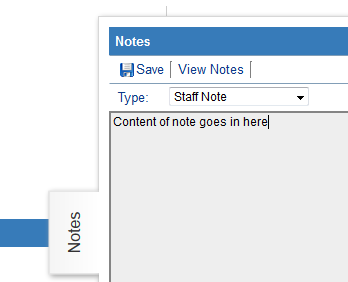
If you have activated HTML text editing in your user profile, the Notes window will appear with the editing toolbar.
3. Input the content of the note.
4. Click the Save button.
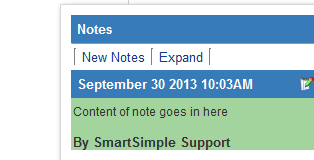
The note will be saved and displayed in the note window.
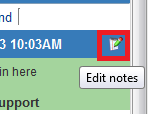
You may click the Edit Notes icon if you wish to revise your note again.
Other users may add notes but are not permitted to edit your notes.
Event Types
Standard Event Types
Several Standard Event Types can be selected when creating a new calendar appointment.
The following standard Event Types are integrated into SmartSimple's calendar application: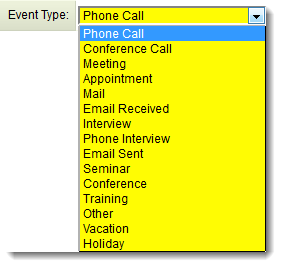
Reminder Templates can be configured for each Event Type in the Classic Options section of the Global Settings page.
Custom Event Types
Custom Event types with custom fields can be added to the system via the Global Settings tab.
For instance, if you need to track Webex meetings, you can introduce a new event type Webex to the system.
The Event Types setting in the Classic Options section of the Global Settings page allows for the creation of new Event Types within your instance.
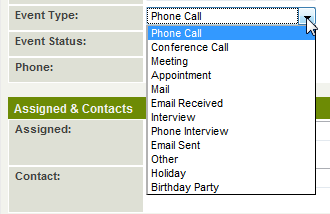
For example, you may wish to establish a custom Event Type titled Birthday Party.
To accomplish this:
- Navigate to Global Settings
- Select the link for Event Types under the Classic Options section, then click on the New tab.
- Provide a Name for your new Event Type (e.g., "Birthday Party").
- Specify a display order, which will influence the sequence in which the Event Type appears in the dropdown when creating or editing a Calendar event.
- Setting your display order to "100" will position the event type at the bottom of the list of existing event types.
- Choose a Color Code, which will be displayed when utilizing the "Event highlighting" option within a contemporary Calendar.
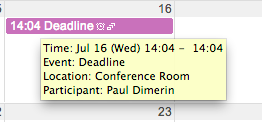
- In the "Calendar Preview Template" field, users can input information (text or variables) that will be displayed when a user hovers over the event in the Calendar. If left blank, the system will default to the template, which includes: time & date, event type, location, and participants.
Event Highlighting
The calendar has been enhanced to allow for switching between event coloring based on Event Type or the current calendar-based coloring dynamically.
The color is defined using the Color Code field within an Event Type.
Event highlighting enables differentiation of Event Types by colors; for example, vacation events may be associated with one color while meeting events may be linked to another.
Holiday Calendar
The Holiday Calendar serves as a SmartSimple calendar that records dates designated by your organization as holidays. It can be utilized in conjunction with formulas to execute calculations on and modify date fields, ensuring that your organization's holidays are factored in when a specified number of business days are added or subtracted from a date.
Configuring the Holiday Calendar
- Create a new Calendar
- Establish Events in the Calendar with the Event Type designated as "Holiday" on the dates you intend to mark as statutory holidays.
The following formulas, which will consider the holidays you have configured, may now be employed:
-
Adding business days to a specified date:
SS_FUNC.addbusdays(DATE, BUSINESSDAYS)
-
Calculating the number of business days between two dates:
SS_FUNC.countbusdays(FIRSTDATE, SECONDDATE)
Integration of Holiday Calendars in Workflows
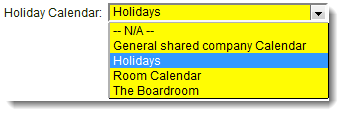
Holiday Calendars can also be designated within Workflows. The option to select a specific Holiday Calendar for a given Workflow is available in the Workflow Connector.
Configuration Examples
This template supports the Web Page View Field Variables including sslogic.
Example: Assume a Level 2 Type named Site Visits, along with a custom field on that Level 2 Type labeled Site Location with a custom field ID of 12345.
You may utilize the following syntax in the "Calendar Fields" section of the Miscellaneous tab on the UTA Settings Page:
<!--@sslogic('@type@'='Site Visits')-->@#12345#@<!--@end-->
This will exclusively display the Site Location field (field ID 12345) for Site Visits Level 2 type activities on the Level 1 calendar. To incorporate multiple conditions:
<!--@sslogic('@type@'='Site Visits' and '@statusname@'!='Closed')-->@#12345#@<!--@end-->
This will yield the same result as above, but only if the Status of the Level 2 item is not Closed. Level 1 fields can also be included using:
@parent.fieldname@
