Overview
Configuration Mode is a feature accessible to all Administrators within the system. This mode facilitates a more streamlined approach for accessing and modifying fields. Administrators can engage with the configuration directly from within a record.
Users who do not possess an Administrator role are not permitted to utilize Configuration Mode.
Configuration Checklist
The following checklist outlines a sequence of tasks to consider when configuring your instance of SmartSimple prior to granting access to users:
- Configure Organization Settings - establish color schemes, licensing, backup and terminology.
- If necessary, define the custom fields required for organizations – incorporate the fields essential for accurately representing your business.
- Create or upload organizational information for both internal and external organizations – input organization data into the system.
- Define roles for individuals – specify the roles that individuals occupy within the business to accurately reflect organizational structure.
- Establish any custom fields for roles – incorporate the fields necessary to accurately depict the roles of individuals within the business.
- Define or upload "people" - internal or external organizations – add individuals to the system.
- Subscribe to SmartSimple applications – identify the applications required by each user group.
- Assign Manager Permissions to specific roles – determine which groups are accountable for each application and feature.
Using Configuration Mode
To access Configuration Mode, the Administrator must first enter Edit Mode.
1. After opening any record, an Edit button will be available, which allows entry into Edit Mode.
2. Click the Tools button, which will reveal a drop-down menu.
3. Under the Admin section, select Configuration Mode.
A small tab will appear at the top of the page indicating that you are in Configuration Mode, along with Refresh and Close icons.
Subsequently, as you hover over the fields in the record, they will be highlighted and can be selected.
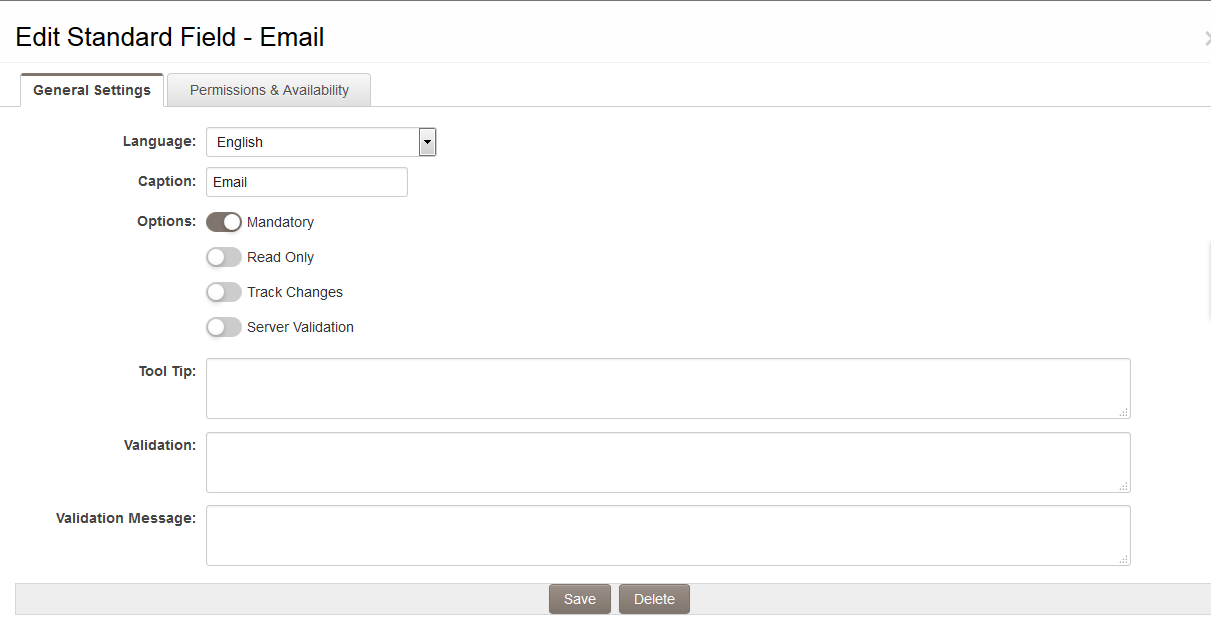
Upon clicking a field, a modal window will open displaying the configuration page for that field. Modifications can be made and saved, and will be reflected in the field once the page has been refreshed.
Configuration Shortcuts / Variable Syntax Helper
When the Configuration Mode icon is selected in Edit Mode, the Configuration Shortcuts section will also be displayed on the right side of the screen.
This section contains links to many of the General Settings pertinent to the entity currently being accessed.
Additionally, it features a link to the Variable Syntax Helper. This functionality enables administrators to verify Variables syntax and Type Formulas against actual records.
- Click on the link to the Variable Syntax Helper.
- Input variable syntax in the panel located on the left side of the Variable Syntax Helper tool page.
- NOTE: Press the "Tab" key to view available keywords
- Click the "Process Variables" button.
- Results will be displayed in the grey panel on the right side of the Variable Syntax Helper tool page.
Variable Syntax Help
At the bottom of the Variable Syntax Helper window, you will find an expandable section designed to offer detailed guidance and syntax examples for a variety of use cases. This section is initially collapsed to keep the interface clean and organized, but you can easily access the information by clicking the small carrot-shaped arrow icon. Once expanded, this area provides helpful instructions and examples that can assist you in understanding how to properly use different variable syntax options. This feature is especially useful for troubleshooting, and for users who want to ensure accuracy and efficiency when working with variables - as it offers quick and convenient reference material right where you need it.


