Overview
SmartSimple offers the capability to define multiple submit buttons that correspond to distinct statuses within a User Task Assignment (UTA).
These buttons can be configured for visibility to specific subsets of users, to execute particular validation checks, and to transition the event to a designated status.
Configuration - Essentials
Create a Submit Button
To create a Submit Button:
- Navigate to the UTA to which you wish to add the Submit button.
- Click the Configuration Settings button within the UTA.
- If you intend to add a submit button to a Level 1 entity, select the second tab containing your Level 1 settings. If you wish to add a submit button to a Level 2 entity, select the third tab containing your Level 2 settings, and so forth.
- Click on the Submit & Save Buttons link under the General Settings header.
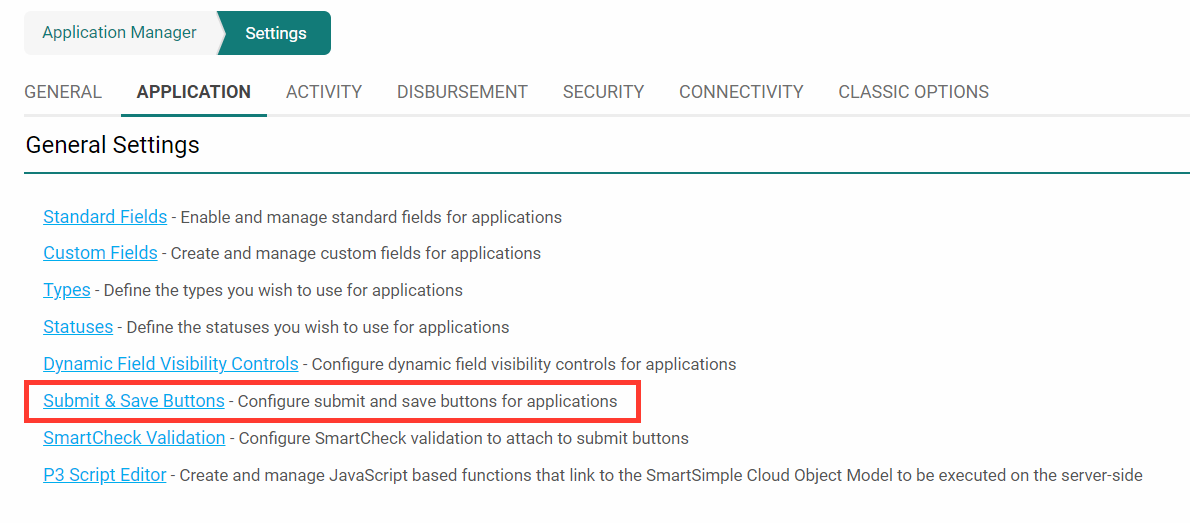
- The Submit & Save Buttons page will be displayed.
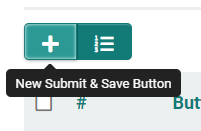
- Click on the New Submit & Save Button button, indicated by the + sign.
- A new window titled New Submit & Save Button will appear, allowing you to configure the submit button. Please refer to the section below for a detailed explanation of each setting.
- After configuring the Submit button to your satisfaction, click Save.
- The submit button you have created will now be listed in the Submit Buttons section.


New Submit & Save Button Page - Settings
The New Submit & Save Button page includes the following settings:
| Setting | Description |
|---|---|
| Type | Type options include Submit Button, Save & Validate Button, Save Draft Button, and Submit Annotation. Please refer to the Submit Logic on Save or Save Draft Buttons for further information. |
| Order | This indicates the order in which the button will appear on the screen, with lower numbers appearing further to the left. |
| Caption | This is the text that will be displayed on the button. Typically, the button is named after the action it triggers. For example, if a button sends applications into Approved status, it would be labeled "Approved". |
| Icon Style | These are various groups of icons including Brands, featuring brand logos; Light, containing outline-style icons with light line weights; Regular, which includes outline-style icons with heavier line weights; and Solid, which consists of monochromatic glyphs with solid fills. |
| Icon | Graphic icons can be included on the Submit & Save button to clarify and reinforce its purpose. Simply select the icon group using the Icon Style dropdown, and then use the Icon dropdown to choose the desired icon. |
| Description | Definition and general description of the submit button. This will not be displayed on the button. |
| Align to | Select the preferred alignment of the button at the bottom of the window (Center, Left, Right). |
| Available to Status | The statuses in which the button will be visible. This corresponds to the status of the record prior to being submitted to the subsequent status designated by the button. |
| Submit to Status | This indicates the status to which the entity should be updated after the button is clicked. Use this dropdown to select the destination status for the submit button. |
| SmartCheck Validation | Select the SmartCheck Validation method required for the button. This feature is used to attach custom validation conditions to this button, preventing users from proceeding without satisfying the specified custom SmartCheck Validation conditions. |
| Bypass Field Validation | A flag indicating that the status should change without the system performing all field validations (bypassing fields marked as Mandatory). The Submit Logic associated with the button will still be validated. |
| Custom Script | Include any custom scripts here that will be executed upon clicking the button. |
| Enable Confirmation Alert Message | Toggle this option to enable an alert message that appears when the button is clicked, prompting the user to confirm their intention to proceed. |
| Confirmation Message | This field appears only if a Confirmation Alert Message is enabled. Here, enter the message you wish to display in the alert. |
| Enable Confirmation Page | Toggle this option to create a Confirmation Page to which the user is directed after clicking the submit button. The content of this page is determined by the subsequent options that appear. |
| Title | This field appears only if the Confirmation Page is enabled. The title specified here will be displayed at the top of the Confirmation Page. |
| Message | This field appears only if the Confirmation Page is enabled. The message specified here will constitute the body content of the Confirmation Page. |
| Redirect URL | Specify the URL to which the user should be redirected following a successful submission. NOTE: Redirects must be relative paths (e.g., /wiki/index.php) rather than absolute paths. |
| Button Caption | This field appears only if the Confirmation Page is enabled. The caption specified here will be included on the button featured on the Confirmation Page. Typically, this would be a link back to the user's home portal. |
| Button Icon Style | This field appears only if the Confirmation Page is enabled. This determines the style of the icon included in the button featured on the Confirmation Page. These are the various groups of icons including Brands, featuring brand logos; Light, containing outline-style icons with light line weights; Regular, which includes outline-style icons with heavier line weights; and Solid, which consists of monochromatic glyphs with solid fills. |
| Button Icon | This field appears only if the Confirmation Page is enabled. Icons selected from this dropdown will be included in the button featured on the Confirmation Page. |
| Redirect Payment Form | If you have a payment integration form configured, such as a Stripe integration form, selecting it from this dropdown will designate it as the destination for users who have clicked this button. |
Permissions and Availability Settings
The New Submit and Save Button page, particularly the Permissions and Availability tab, encompasses the following settings:
| Setting | Description |
|---|---|
| Role - Permissions | Designate which roles are granted access to the button. Activating Use UTA Role will implement role-based permissions for users assigned to UTA Roles. |
| Type - Availability | Indicate the record types on which the button will be visible. |
| Visibility Condition | Input custom visibility conditions for the button in this section. |
| On New Record | Specify how the Submit Button will be presented on a new record. Options include "Always Display", "Hide on New Record", "Only Show on New Record". |
Notes
The Submit Annotation type button will only be visible on the record if it is under Status lock. This button type is employed to submit field modifications and will log the changes in the revision history.
Submit Logic
- This feature functions in conjunction with the Submit Buttons, facilitating the establishment of numerous submission rules that regulate the submission process.
- When a submission process is governed by submission logic, values at other levels can be validated.
- Values are validated based on the sequence defined within the submission logic.
- From Level 1, the submission rules can access any field at Level 1, as well as account/contact fields, and aggregated fields at Level 2 and/or Level 3.
- The Submit Logic feature is linked to a specific status and submit button. Associating the conditions with each status and button permits different statuses to control sets of Submit Logic rules.
NOTE: The focus here is on basic Submit Logic validation using Submit Buttons. Details on how Submit Buttons interact with SmartCheck validation will be addressed in the SmartCheck Validation article.
Accessing Submit Logic
To access the Submit Logic feature:
- Select the Settings tab within the UTA, then navigate to the Level 1, 2, or 3 settings page as applicable.
- Click on the Submit and Save Buttons link in the settings page.

- The Submit and Save Buttons page will be displayed. It should list all existing Submit buttons and provide an option for creating new submit buttons at the top of the screen.

- Select the Edit icon for one of the listed Submit and Save Button options. This will direct you to the Submit Button configuration screen.

- Select the Submit Logic tab. You will be redirected to the Submit Logic configuration screen, which should list all existing Submit logic, and provide an option for creating new Submit Logic at the top of the screen.

- Click the New button to initiate the addition of new Submit Logic.
 Each Condition comprises the following fields:
- Order - the sequence in which the condition may be executed. Each condition is executed in order based on the defined sequence. Once all conditions have been executed, any failed conditions will halt the submission process, and all messages for failed conditions will be displayed in a consolidated manner.
- Name - a descriptive name for the condition.
- Description - a narrative description of the condition.
- Condition - stores the expression representing the condition. The entity does not change status when the condition evaluates to false.
- Message - stores the message to be displayed if the condition is not satisfied.
Condition Construction
Conditions consist of references to fields and aggregate functions, employing the same syntax as the Template / Type Formula.
Conditions should be constructed to evaluate as TRUE when the record is to be submitted.
The Message will be displayed when the condition evaluates to FALSE, resulting in the record not being submitted.
The following examples illustrate various instances of the submit logic:
1. Criteria: The Reviewer Comments field at level 2 must not be left blank.
"@level2.Reviewer Comments.length@"*1 > 0
OR
CONVERT("@level2.Reviewer Comments.length@",SIGNED INTEGER) > 0 It is important to note that the above represents best practice for checking for empty fields, as opposed to using
"@level2.Reviewer Comments@"!=""
2. Criteria: a minimum of three level 2 items (of any type) are required to submit the level 1 item.
@level2.count(*)@>2
3. Criteria: a minimum of three level 2 items where the type is email are required to submit the level 1 item.
@level2.count(*):typename='email'@>2
4. Criteria: a minimum of three level 2 items where the type is email and the status is closed (for both items).
@level2.count(*):typename='email' and statusname='closed'@>2
5. Criteria: the submission cut-off date and time has not passed
"@datetime(currentdate)@"<"@datetime(level1.Contract Start Date)@"
Note that you will need to create a System Variable that stores the cut-off date and time in the following format: yyyy-mm-dd hh:mm:ss (24-hour clock)
6. Criteria: an XML table node is not blank
"<ssEscape>@level1.xml.Budget.comment-section.row.comment.nodevalue@</ssEscape>" != ""
Additional examples:
CONVERT("@level1.fieldname.length@",SIGNED INTEGER) > 0
This ensures that fieldname is not empty.
@company.commission rate@ > 0.3
The commission rate for the associated company must exceed 0.3 (30%).
@branch.name@ = 'xyz'
The associated branch name must be 'xyz'.
@total salaries@ < 400000
The total salaries field in the Level 1 Entity must be less than 400,000.
@level2.sum(megawatts)@ > 5
The sum of the megawatts field across all level 2 entries must exceed 5.
@level2.sum(#12345#)@ > 5
This is analogous to the previous example but utilizes the custom field ID.
"@level1.Anticipated Project End Date@" BETWEEN "@rootcompany.Project Start Date@" AND "@rootcompany.Project End Date@"
The date entered in the Anticipated Project End Date field must fall between the system-wide Project Start and End Dates.
"@opportunity.peopleid@"!="0"
This ensures that a contact has been added to the Level 1 Person standard field.
"@contacts.count(*):rolename='Supervisor'@"="1"
This ensures there is precisely one contact at Level 1 with the role of Supervisor.
"@companies.count(*):rolename='Funding Agency'@"<"3"
This ensures that there are fewer than three Funding Agencies in the Companies section.
"@contact.supervisor.email@"!="@contact.referee.email@"
This ensures that the contact assigned at Level 1 with the role of Supervisor is not also assigned with the role of Referee.
"@level1.Proposal.filename@"!=""
This ensures that a Proposal has been uploaded in the single file upload field at Level 1.
"@level1.Plan Details.numofpages@"<=6
This ensures that the number of pages for a PDF file upload field does not exceed six pages.
"@level1.Multiple File Uploads.numoffiles@">0
This ensures that the number of files uploaded to a Multiple Files upload field is greater than zero.
"@level1.type@"!="New Grant"||"@level1.xml.ExternalPeers.peer.peer.nodecount@">2
This ensures that the Level 1 type is 'New Grant' and that the number of nodes/items entered in the XML worksheet exceeds two items.
"@level1.Amount Awarded.value@" <= 500000
This ensures that the Amount Awarded field is less than or equal to $500,000. The .value is necessary when the Amount Awarded field is stored in currency format.
INSTR("@level1.[#(?object=activity::criteria=typename='Referee Form' and statusname='Submitted' and eownerid=@me.userid@)~index~#]@","1")=0
This ensures that the current user cannot submit more than one review.
@level1.Grant Amount@>=@level1.level2.sum(#1478912.value#)@+@level2.#1478912.value#@
This confirms that the payment total does not exceed the approved total.
LENGTH("@level1.Check Boxes@")-LENGTH(REPLACE("@level1.Check Boxes@",";",""))+1>=3
This confirms that at least three checkboxes have been selected in a Select Many - Check Boxes field.
*Please note that semicolons cannot be included in submit logic criteria. If using list syntax, employ double colons ("::") to separate arguments.
Message Construction
- Messages are generated for each condition, providing the user with specific details regarding the unmet condition requirement.
- The messages will be displayed in a pop-up window upon a failed submit logic condition when the user attempts to submit. If multiple submit logic conditions fail, the messages will be shown in a consolidated pop-up window.
- Field names and aggregate functions can be utilized in a manner similar to that of condition construction.
- For instance, using the first condition example provided above, a message can be incorporated such as:
At least three appendices are required to submit this proposal, but only @level2.count(*)@ were found. Please check and then submit the proposal again.
- This message will be displayed if the @level2.count(*)@>2 evaluates to false.
- The message will appear as follows:
