Overview
SmartFolders provide online storage for files in a secure central location, accessible from any computer with Internet connectivity.
SmartFolders Features
| Feature | Functions |
| Permissioned Access |
|
| File Check Out/Check In |
|
| Workflow Driven |
|
| Internet Enabled |
|
| External Notes |
|
| Email File |
|
| Folder Size Limitation |
|
Configuration — Essentials
Setting Up SmartFolders
To access your SmartFolders, click the 9-square menu icon located at the top right of your page.
Under the heading Tools, select SmartFolders to display your SmartFolders window.
- Initially, there will be no folders or files available.
Within your SmartFolders window, select New to create a new SmartFolder.
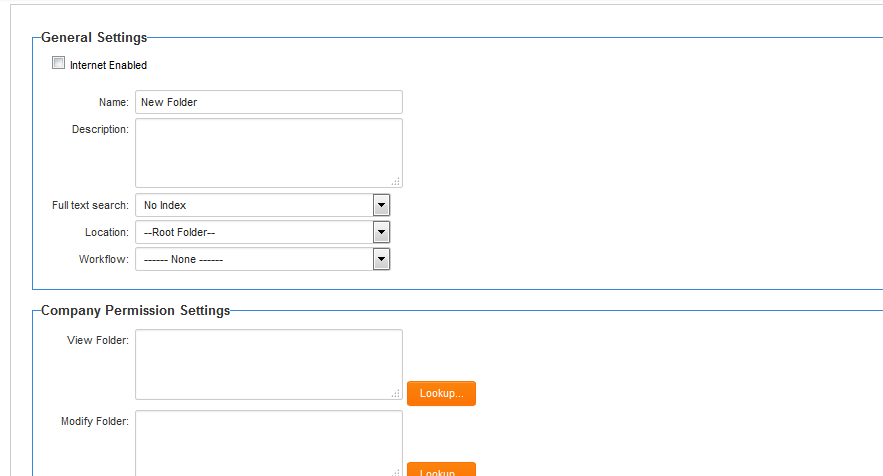
The New Folder window will be displayed.
Folder Settings
There are two views available for a folder:
- Folder Setting View: This view displays the security and other settings for the folder. This is the view presented upon the initial creation of a folder.
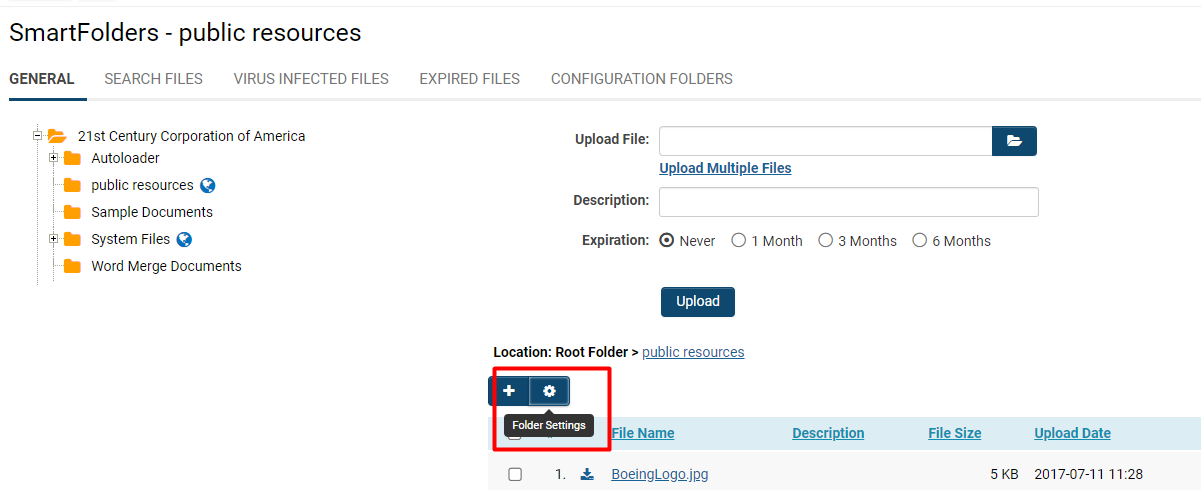
- Folder Content View: This view displays the files you have uploaded to the folder. When opening an existing folder, the content view is utilized. If you need to view or modify the folder settings, select the Folder Settings button.
Folder Content and Properties
Each folder possesses the following properties:
| Property | Description |
| Internet enabled | Displays a web address or URL that can be used to navigate to the folder on the Internet. Anyone can access this URL to view the folder contents. If this feature is utilized, the folder must be permissioned for Everyone access. |
| Name | The designated name for the folder. |
| Description | A detailed description of the folder's purpose. |
| Full Text Search | Option to index all contents of the folder, including any sub-folders. |
| Location | The position within the folder hierarchy where the folder should be displayed. You can modify the parent folder and relocate the folder within the hierarchy. |
| Workflow | Link this folder to a workflow process that will automatically initiate whenever a new file is added to the folder. |
| Company Permission Settings - View Folder | A list of organizations permitted to read the contents of this folder. |
| Company Permission Settings - Modify Folder | A list of organizations authorized to modify folder settings. |
| Role Permission Settings - View Folder | A list of roles permitted to read the contents of the folder. |
| Role Permission Settings - Modify Folder | A list of roles authorized to modify folder settings. |
| Role Permission Settings - Upload Files | A list of roles authorized to upload files into the folder. |
| Role Permission Settings - Create Sub-folder | A list of roles authorized to create sub-folders within the current folder. |
- The roles available to any user are contingent upon the permissions associated with their role.
- If you do not establish permissions for a folder at the root level, you, as the owner, will be the sole individual able to access the folder.
Folder Security
Folders created within an existing folder inherit the security settings of the parent folder. Any alterations made to the security of the parent folder will also be applied to the associated lower-level folders.
In this example, you will examine the General Settings and Security Permissions of SmartFolders by granting Everyone access to view a folder.
1. Select an existing folder to view its contents and details.
2. Access the Folder Settings by selecting the gear icon.
3. Under Company Permission Settings - View Folder, select the binoculars icon.
4. A window listing organizations will appear.
5. Check the option for Everyone.
6. Click the Save button.
You may repeat this process for other Security Settings under Company Permission Settings or Role Permission Settings. You may modify the Security of a folder at any time by revisiting and selecting different permission accessibilities.
Note: The recommended security measure is to grant access to SmartFolders solely to the System Administrator role through System Features, subsequently enabling or linking the SmartFolders on the portal.
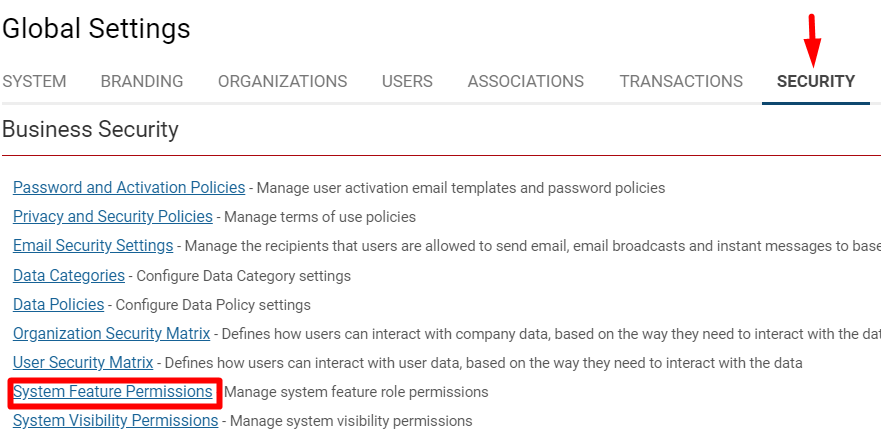
To provide SysAdmins with managerial access to SmartFolders, navigate to Global Settings > Security > System Feature Permissions.
Once you have opened System Feature Permissions, proceed to the tab labeled Action Permission and scroll down until you locate the SmartFolders - Manager box.
Click within the box to select the role(s).
Click Save when you have completed the selection.
Creating a Sub-Folder
Following the previous example, we will now add a sub-folder but restrict access to a specific external company while permitting all internal users to access the folder by referencing the internal Employee role.
1. By selecting the + icon on a folder page, we can create a sub-folder.
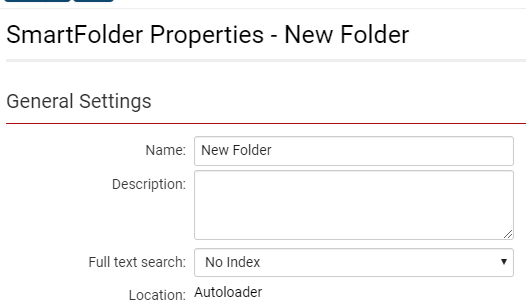
2. A new folder window will be displayed. In this example, the parent folder (Location) is set to "Autoloader."
3. Under Company Permissions Settings - View Folder, select the binocular icon.
4. In the pop-up list of organizations, check the external company you wish to grant viewing access to. In this example, it is "Amnesty International USA."
- Ensure to click the Add button so that the selected company will appear at the bottom, under Selected Companies.
- Ensure to deselect the other options at the bottom, including Inherit From Parent, Deny Company Access, and Everyone.
5. Repeat steps 3 and 4 for Company Permissions Settings - Modify Folder.
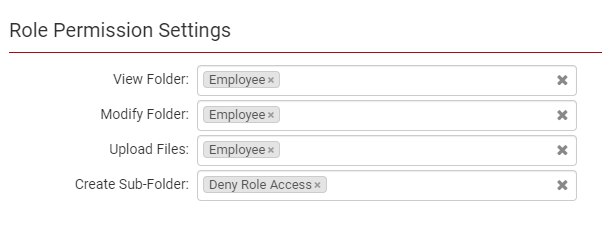
6. Under Role Permissions Settings, complete the following details:
7. Click the Save button.
The access for the sub-folder you have created is now as follows:
- The company access to view and modify the folder is designated to one external company. Individuals from this company can view the contents and add files to this folder.
- The role access is assigned to the Employee role. Any individual in any branch of the internal root organization can view the contents, modify, and add files to this folder.
- The role access is set to Deny Role Access for Create Sub-Folder. This indicates that only the Global User Administrator is permitted to create a sub-folder from this folder.
Depending on the specific instance, it may be prudent to utilize company restrictions to establish security; in other scenarios, roles may prove to be more effective.
Whenever a new item is added for external access, it is advisable to test its functionality.
1. Log in as one of the contacts in the Contacts role.
- Please note that individuals outside of your domain will need to enter their complete email address.
The customer menu will be displayed.
2. Navigate to the 9-square menu icon located at the top right of the header. Under Tools, select SmartFolders.
3. The SmartFolders will be displayed.
- Any folders indicated with a New icon signify that this is the first time you (in the Contacts role) are encountering these folders.
- If you have created other folders with different permissions, they will not be visible.
4. Log out from SmartSimple.
5. Log in as the Global User Administrator.
6. Follow Step 2 to return to the SmartFolders window. Your new folders will be displayed without the New icon.
SmartSimple will retain the last view of the folders and re-display this view upon your next use of the application.
Uploading Files to a Folder
Once you have created a folder, you are able to upload files into that folder.
Please remember:
- Clicking on the folder name will display the folder contents, along with the Browse and Upload buttons, the Create Folder button, and the Folder Properties button.
- If the folder contains sub-folders, the names and creation date/time of these sub-folders will be displayed.
- Clicking on a sub-folder name will display the contents of that sub-folder.
- Clicking the Folder Properties button will display the folder settings.
Uploading a File — Step by Step
Follow these steps to upload a file or multiple files to a SmartFolder.
1. Click on the 9-square menu icon located at the top right of your page.
2. Under the Tools heading, select SmartFolders.
3. Click on the SmartFolder to which you wish to upload a document. The contents of the selected folder will be displayed.
4. If the file is to be uploaded to a sub-folder of the current SmartFolder, click into the sub-folder by selecting its name.
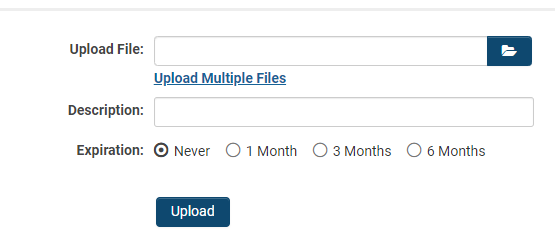
5. After navigating to the destination folder, click on the Folder icon to browse for the file you wish to upload.
- In the File Upload screen, navigate to the file you wish to upload, select it, and click the Open button. You may also upload multiple files.
6. Once you have uploaded your file(s), they will appear in the list at the bottom.
File Options
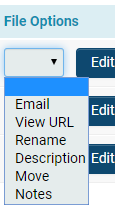
Upon uploading your file, you can modify the options associated with that file. On the far right of the file list, the following options are available:
- Email: Send the file to any contact with a valid email address in SmartSimple.
- View URL: Displays a short link that can be utilized to embed a link to the file in an email.
- Rename: Change the name of the file.
- Description: Modify the description of the file.
- Move: Relocate the file to a new folder.
- Notes: Add notes pertaining to the file.
File Check Out/Check In
Checking Out a File
Adjacent to the File Options is the Check Out icon.
Clicking on this icon will enable you to check out that specific file. Complete the Check Out Note and then select Check Out.
Tips:
- Once a file is checked out, it cannot be modified or deleted until the individual who checked it out (or a user with the role of System Permission - SmartFolders - Manager originally checks it back in. If the file has not been checked in, the check box displayed next to the file name will be greyed out.
- If you have the software application installed on your computer that corresponds with a specific file type, the file will be displayed with the appropriate application icon.
Checking In a File
Checking a file back in will once again permit changes to the file. To check in a file to the appropriate folder, return to that folder and select the Exclamation icon on the far right of the file list.
Locate the file you previously checked out and downloaded, and select the Check In button at the bottom of the page. This action will check the file back into the folder.
The Undo Check Out button will revert the file back to the version it was prior to being checked out.
Downloading Files
To download a file onto your computer, select the Download icon adjacent to the file you wish to download.
You must repeat this downloading process for each file that you wish to download within a SmartFolder.
If you desire to maintain synchronization of sets of folders with local folders, download a copy of the SmartSync Utility to keep your desktop files in sync with your SmartSimple copies.
Online Editing
Documents created in Microsoft Word, Excel, and PowerPoint that are uploaded to SmartSimple can be edited directly within the system, eliminating the need to download, modify, and re-upload each document. Upon saving the file within the application being used, it will be automatically uploaded to SmartSimple.
While the document is being edited, it will be designated as Checked Out to prevent simultaneous editing by other users.
When enabled, selecting the Edit button adjacent to the uploaded file will open the document in the respective Microsoft application. All versions of Word, Excel, and PowerPoint are supported. Once the necessary edits have been made and the file is saved, the changes will be accurately reflected in the document stored in the SmartFolder or custom field.
For further information regarding the online editing process for files from SmartFolders, please consult our Online Editing page.
Deleting Files
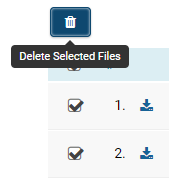
To delete a file from a SmartFolder, please check the box next to the file name.
Once the box for one or more files is checked, the Trashcan icon will appear, enabling deletion of the selected files.
To delete an entire folder, please access the folder properties and click the Delete button.
Configuration - Advanced
Increasing SmartFolder Storage Limits
Each organization is allocated a predetermined amount of file storage space for SmartFolders. The current storage usage can be viewed in the Storage Summary window within your instance of SmartSimple's Global Settings.
1. Click the 9-square menu icon located in the top right corner of your page.
2. Under the heading Configuration, select Global Settings.
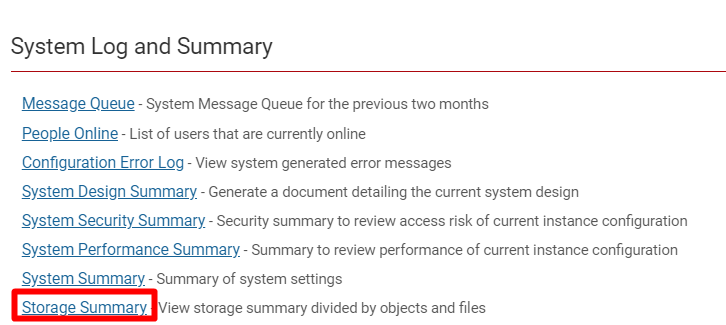
3. On the first tab of Global Settings, scroll down to the subheading System Log and Summary.
4. Click on the hyperlink Storage Summary to generate a summary of the system storage information.
To increase storage limits, please contact your Account Manager.
Configuration Folders
The Configuration Folders feature is integrated within SmartFolders.
While the files within SmartFolders are stored as files within the SmartSimple application system, Configuration Folders will store files within the SmartSimple database. Configuration Folders are particularly beneficial for branding or styling applications.
Advantages:
- Enhanced capability to transfer files across environments during the change management process utilizing tools such as the Test2Production change promotion tool
- Future enhancements can be developed around these files to store additional metadata related to the file, such as tracking changes and file versioning
Please be advised that there is a 16MB size limitation on files stored within Configuration Folders.

