Configuring Global Settings
1. In order to establish an initial connection with Adobe Acrobat, an Integration Key will need to be created from:
System Administration (gear icon) >> Global Settings >> Integrations (tab) >> Inegration Key Management
2. Click on New Integration Key. You will be prompted to complete the following fields:
- Key Type: set to Adobe Acrobat Sign
- Key Name: Adobe Acrobat Sign
- Application ID (#3): unique Adobe Client ID (from Adobe Acrobat Sign Account)
- Client Secret (#4): unique Client Secret (from Adobe Acrobat Sign Account)
- Authentication URL (#5): URL is generic based on your location (from Adobe Acrobat Sign Account)
To retrieve the aforementioned information from your Adobe Sign account:
3.1. Log in to your Adobe Account
3.2. Navigate to Account
3.3. To obtain Client ID and Client Secret:
-
- in the Account tab - Adobe Acrobat Sign API - API Applications (fig. 1)
- select the API Applications record (fig. 1)
- click on the link Configure OAuth for Application (fig. 2)- copy the Client ID for Application ID (#3)
- copy the Client Secret for Client Secret (#4)
- ensure that the Redirect URI includes the link for your instance, e.g. https://smart.smartsimple.com/OAuthsp/callback.jsp or https://abcfoundation.smartsimple.com/OAuthsp/callback.jsp
- in the "Enabled Scopes" section (fig. 2.1):
i) select "self" for the scopes: user_login, agreement_read, agreement_write, agreement_send to authorize agreement permissions
ii) select "self" for the scopes: webhook_read, webhook_write, webhook_retention to authorize webhook permissions3.4. To obtain the Authentication URL:
- in the Account tab - Account Settings - Account Setup (fig. 3)
- verify Hostname, e.g. na2.echosign.com or eu1.echosign.com (fig. 3)
- use this information to construct the Authentication URL (#5), ** only take the content starting from the region portion, e.g. na1, na2, eu1 etc:
e.g. Adobe Sign Hostname = eu1.adobesign.com --> Authentication URL = https://secure.eu1.adobesign.com/public/oauth
e.g. Adobe Sign Hostname = na2.documents.adobe.com--> Authentication URL = https://secure.na2.adobesign.com/public/oauth
(e.g. https://secure.adobesign.com/public/oauth or https://secure.na2.adobesign.com/public/oauth or https://secure.eu1.adobesign.com/public/oauth, etc.)NOTE: For certain Adobe Sign accounts, the version must be appended to the Authentication URL. If you encounter an error stating "use_oauth_v2_apis" during the authentication process, append /v2 to the Authentication URL (e.g. https://secure.adobesign.com/public/oauth/v2 or https://secure.na2.adobesign.com/public/oauth/v2 or https://secure.eu1.adobesign.com/public/oauth/v2)
4. Click Save.
5. The Online Signature Provider section allows you to select the e-signature partners; please select Adobe Acrobat Sign by navigating as follows:
6. Click Save, and after the page refreshes, under Online Signature Provider, click Verify Adobe Acrobat Sign Access.
7. A popup will appear; please enter your login credentials for the relevant Adobe Account and authorize access for SmartSimple.
Configuring the Web Page View
On the Web Page View where you wish to enable signing, activate the following two settings:
1) Online Signature: This will enable a new button on the Web Page View entitled "Online Signature."
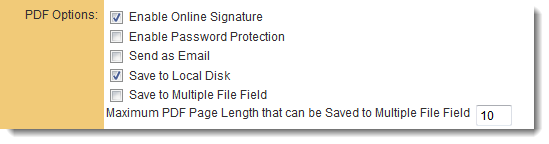
2) Store-To value: This setting determines where the finalized PDF document will be stored within the system.

Flatten Attached PDFs
When generating a PDF for signing, ensure that any attached PDF files do not contain digital signatures, as Adobe will reject the entire document if any attached files are digitally signed. The Adobe Sign Integration permits only one digital signature field per signer.
If you need to attach a signed PDF using ssattach to the document you intend to send for e-signatures, you must first flatten the PDFs to be attached.
For further information about flattening PDFs, please visit https://www.adobe.com/acrobat/hub/how-to-flatten-a-pdf.html
Signature Tag Parameters
The signature tag is utilized to define the contact details and signing order for the signee.
- {{_es_:sender:title}} - name of the sender. This will correspond to the name associated with the Adobe Acrobat Sign account configured in the Global Settings.
- {{_es_:signer1:signatureblock}} - may be used for specifying one signature line placement in conjunction with syntax for defining the signee using variable syntax
- {{_es_:signer~Index~:signature}} - will automatically include all the signees' signatures from the contact list to the web page view
- {{_es_:signer~Index~:signatureblock}} - will automatically include all the signees' signatures from the contact list to the web page view
- {{_es_:signer~Index~:initials}} - will automatically include all the signees' initials from the contact list to the web page view
- {{_es_:signer~Index~:company}} - will automatically include all the signees' company from the contact list to the web page view
- {{_es_:signer~Index~:fullname}} - will automatically include all the signees from the contact list to the web page view
- {{_es_:signer~Index~:optsignature}} - will automatically include all the signees from the contact list to the web page view as optional signatures
- {{_es_:signer~Index~:optinitials}} - will automatically include all the signees' initials from the contact list to the web page view
- {{_es_:signer~Index~:date}} - will automatically include the date of signature for all signees
- {{_es_:signer~Index~:digitalsignature}} - will automatically include all the signees' digital signatures from the contact list to the web page view (clients are required to set up the Digital Signatures setting in their Adobe Sign account - Account - Digital Signatures)
Note: The Adobe Acrobat Sign syntax above does not function within an HTML span tag; if necessary, please use a div tag instead.
Signee Email Subject and Body and Other Details
The signees receive an email containing a link to view and sign the document. The custom details of the email can be configured with tags added on the Web Page View. Variables and text may be utilized.
<!--SignatureEmailSubject System No: @opportunityid@--> |
The SignatureExpiryDays tag indicates the number of days remaining before the document expires on Adobe Acrobat Sign. If not configured, SmartSimple will expire it after 30 days.
The SignatureFlow tag is utilized in conjunction with List Syntax for contacts and with the signature tags to define the signing order:
- Parallel: <!--SignatureFlow P-->
- Sequential: <!--SignatureFlow S-->
HTML Examples
Syntax for configuring the WPV for Adobe Acrobat Sign is based on the same syntax as Signority, with the exception of specific Signature Tag Parameters required by Adobe Acrobat Sign. For additional examples, please refer to the Signority Configuration.
Single Signature
For single signatures, you may reference custom fields containing the email, first name, and last name of the signee. In the example below, the recipient has been added as a contact with the UTA role of "Signee."
<!--signature @contact.Signee.email@;SIGNER;@contact.Signee.firstname@;@contact.Signee.lastname@;1--> |
You may also hard code the parameters if there is a contact who will consistently be signing the document.
<!--signature support@smartsimple.com;SmartSimple;Support;1--> |
Multiple Signatures
Utilize the List Syntax for contacts in conjunction with the Adobe Signature Tag Parameters.
Sequential Signatures
The order of the signees is determined by their sequence on the Web Page View. If sorting by criteria other than signing number, such as by name, leave the sequence parameter blank, as the system will automatically assign a number upon submission.
The following example retrieves all contacts associated with the Level 1 having a role ID of 10991 or 10992, and sorts the contacts based on the value of UTA role field 1359726.
The signature tag is delimited by ";" as email, "SIGNER" or "APPROVER", first name, last name, index.
[#(?object=contact;criteria=(roleid='10991' or roleid='10992');orderby=tbl_1359726.valuestr) |