Overview
The various available System Summaries each provide insights into your SmartSimple environment and serve as valuable resources for design, security, performance, and feature overviews.
System Design Summary
Additionally, you possess the capability to generate a Word document that encapsulates a summary of the system settings through the System Design Summary feature.
System Administration (gear icon) >> Global Settings >> System (tab) >> [System Design Summary]
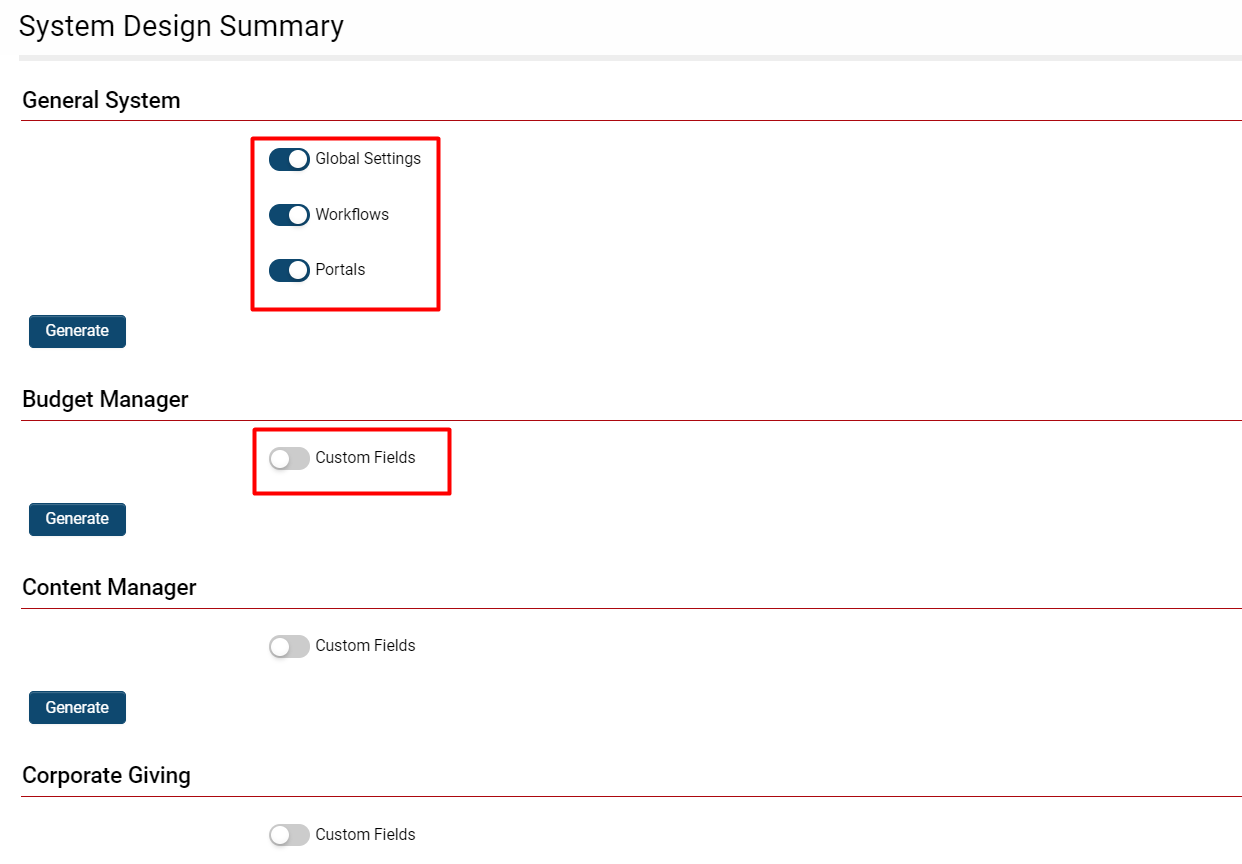
By clicking the System Design Summary link, a modal window will be displayed containing various headings, each corresponding to a section within the system or the General System, along with available Custom Fields or settings that can be incorporated into the documented summary.
| Global Settings | Provides a summary of Global Settings, including Data Policies and Security Matrices. |
| Workflows | Provides a summary of the settings that have been activated for each individual workflow. |
| Portals | Provides a summary of each portal along with the relevant details configured against user roles. |
| UTA Settings | Provides a summary of the settings for each individual UTA, including an option to toggle whether the summary should incorporate Custom Fields. |
After selecting the appropriate modules within each section, click the Generate button. A design summary document will automatically commence downloading to your local computer.
- If there are any settings that you did not activate, you may regenerate the System Design Summary documents by enabling the new options and clicking the Generate button once more.
System Security Summary
The advantage of the System Security Summary is that it provides a consolidated view of all your system security measures, along with identifying any deficiencies in each of them.
System Administration (gear icon) >> Global Settings >> System (tab) >> [System Security Summary]
To enhance your system security, simply click the URL button located on the left side of the security item in the System Security Summary.
- Note: You only need to address the items that display an Attention Required icon under the Attention Required column.
This section will guide you through a step-by-step example of rectifying the security vulnerability related to the Password Policy indicated in the System Security Summary.
1. Identify the security item you wish to configure from the list. The item should feature a red caution icon under the Attention Required column, indicating that the security measures require modification. You may also assess the severity level under the Severity column to determine the criticality of the security vulnerability.
- In this instance, the feature is Password Policy.
2. Review the text provided in the Details column, as this will elucidate the security vulnerability associated with the feature.
- In this case, the issue is that "Password Expiration must be greater than 0."
3. Click on the arrow icon under the URL column. This action will direct you to the configuration page where the security feature is located.
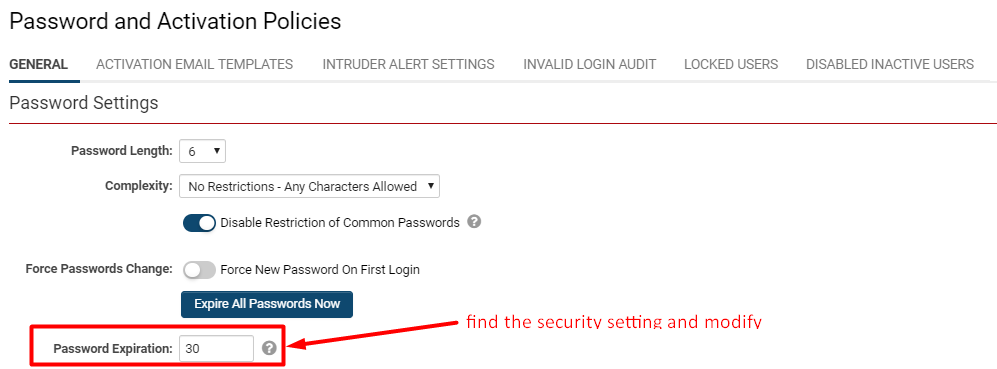
- In this situation, the URL function directs us to the Password and Activation Policies section of the system.
4. Locate the specific setting(s) mentioned in the Details column and modify that setting to enhance security.
6. Upon returning to the System Security Summary, the specific security feature should now be marked as Safe (![]() ) under the Attention Required column.
) under the Attention Required column.
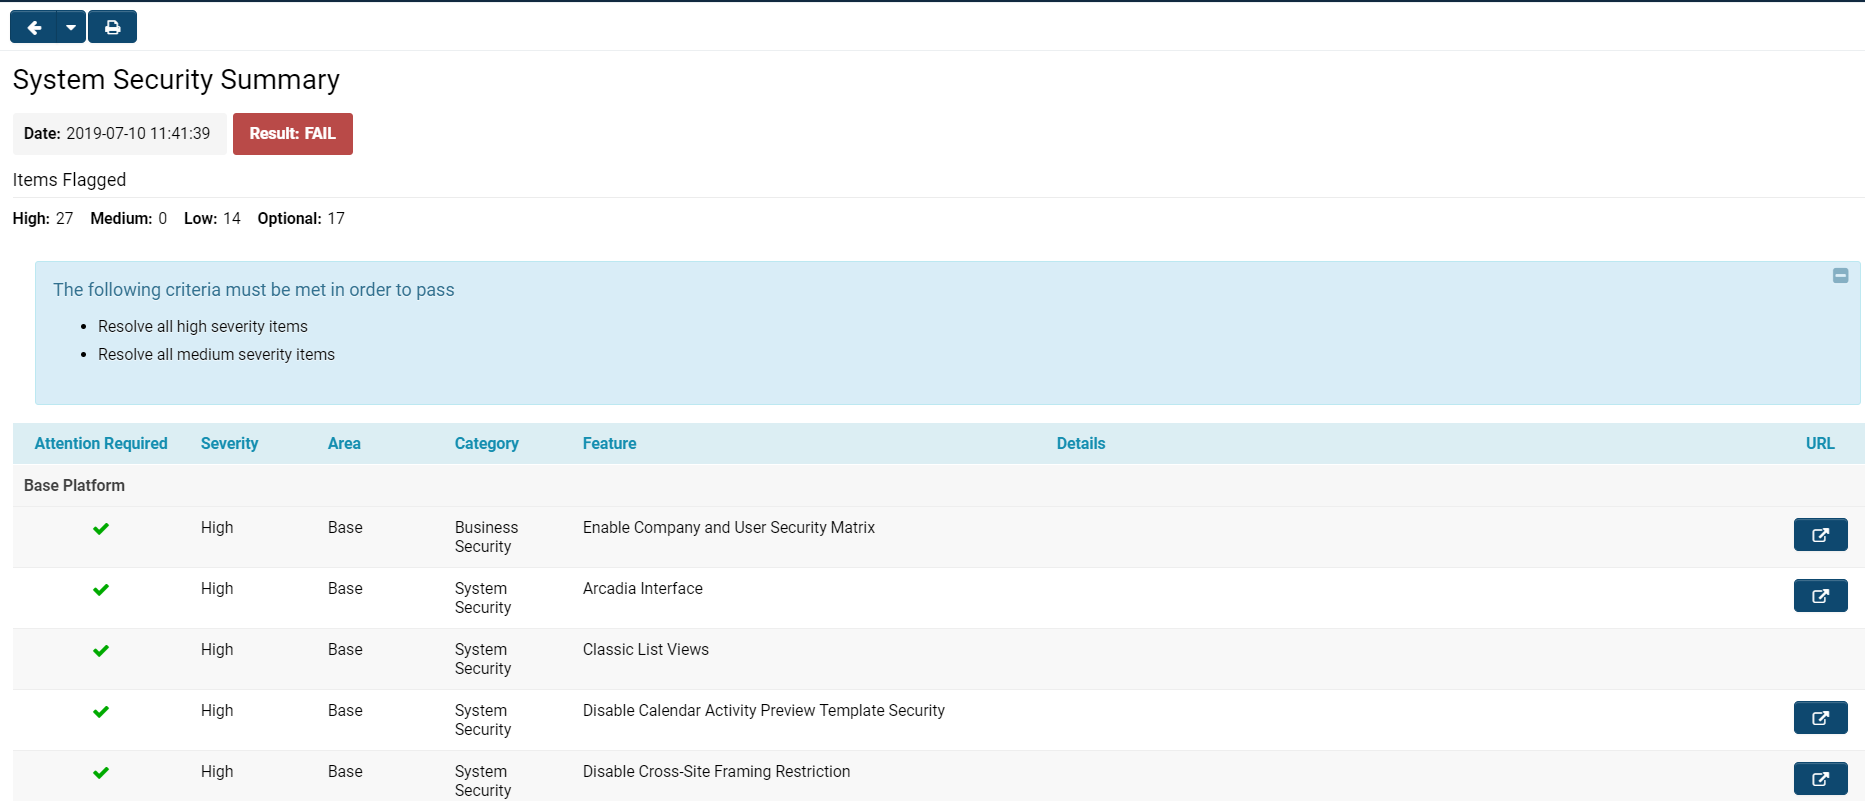
When you access the System Security Summary, you will see a page displayed with details similar to those in the image below:
 The System Security Summary consists of various components.
At the top left of your page, there are two buttons:
- The right arrow allows you to navigate back to the previous page (typically the Global Settings page from which you accessed the System Security Summary.
- Clicking the drop-down arrow will enable you to select from a list of several of the most recent pages you accessed.
- The printer icon will allow you to print a PDF report of all the system security summary information in the same list and structure as organized on the page within the platform.
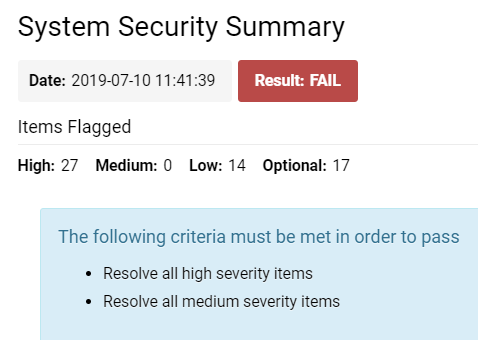
Beneath these buttons and immediately below the System Security Summary title, you will find the following information:
| Date | The timestamp indicating when the system security summary was most recently executed - this will be the time you clicked on the System Security Summary hyperlink from Global Settings. |
| Result | This will represent the outcome generated from your most recent execution of the system security. It will either be a FAIL (red) or PASS (green). |
| Items Flagged |
High - The number of items in the system that are deemed high severity by the system security. It is highly advisable to modify the security settings on high severity items; otherwise, your system security remains vulnerable and insecure. Medium - The number of items in the system that are classified as medium severity by the system security. It is recommended to adjust the security settings on medium severity items to enhance your overall system security. Low - The number of items in the system that the system security summary categorizes as low severity; while it is advisable to change the security settings on these low severity items, it will not critically undermine your overall system security. Optional - These are the items in the system that the system security does not require you to enhance the security on. You may choose whether or not to increase the security settings on these items. |
| The following criteria must be met in order to pass | This text box, which appears at the top of your System Security Summary page, will provide you with a list of the steps necessary to change your security status from FAIL to PASS. For instance, a System Administrator should address all high severity items and all medium severity items. Once these issues are resolved, running the System Security Summary again should ensure a PASS status. |
Beneath these top notifications is the list view of System Security features.
 The columns included in the list view for System Security are explained below:
System Performance Summary
System Administration (gear icon) >> Global Settings >> System (tab) >> [System Performance Summary]
System Feature Summary
System Administration (gear icon) >> Global Settings >> System (tab) >> [System Feature Summary]
System Summary
Note: Access to this section of the system requires that you have been assigned the role of Global Administrator.
From Global Settings, the first tab labeled System contains System Summary:
System Administration (gear icon) >> Global Settings >> System (tab) >> [System Summary]
System Summary Features
| Password Policy | This section will display the current password policies within the instance, including the following details:
|
| Global Administrators | This section will display all assigned Global Administrators within the system. |
| System Security | This section will display all Manager Permissions and Restrictions in the first column, along with corresponding User Roles in an additional column. The value Yes will appear at the intersection of the system component granting permission and the respective role that possesses that permission. |
| Role Fields | This section will display all Custom Fields associated with each user role (distinguished between Internal and External), along with details such as Type, Name, Field ID, etc. |
| Company Fields | This section will display all Custom Fields associated with each organization category (also split into Internal and External) along with the details of each field. |
| Portal Shortcuts | This section will display all the portal shortcuts utilized in each role-based portal, including the icon associated with each shortcut. |
| Notes Permission | This section will display all Notes Permissions in the first column, with each role listed in an additional column. The value Yes will appear at the intersection of the Note type and the role, indicating that a user in that role has permission to utilize that note type. |
| User Mode |
This section will display the User Mode options, allowing for the feature to be toggled on or off for the current user. The available options include the following:
|


